
wewent.to – Help
wewent.to lets you document journeys together with your travelmates using maps, GPS tracks, and photos. This guide explains how to create journeys, manage access, and add content.
Table of Contents
- 1. Journeys
- 2. Creating a Journey
- 3. Editing Journey Details
- 4. Privacy & Access Control
- 5. Roles & Permissions
- 6. Adding Photos and GPX Tracks
- 7. Viewing a Journey
- 8. Commenting & Replies
- 9. Reactions
- 10. Forking Journeys
- 11. Inviting Travelmates
- 12. Importing from Google Drive
- 13. Activity Feed & Notifications
- 14. Following & Profiles
- 15. Personal Tags
1. Journeys
A journey lets you document your shared experience on land or sea, be that an Atlantic crossing or a walk in the park. It combines a map with photos and GPX tracks contributed by multiple users.
2. Creating a Journey
- Sign in to your wewent.to account.
- Open the Journeys page.
- Click the Create button.
- Enter a name and an optional description.
- Confirm to create the journey.
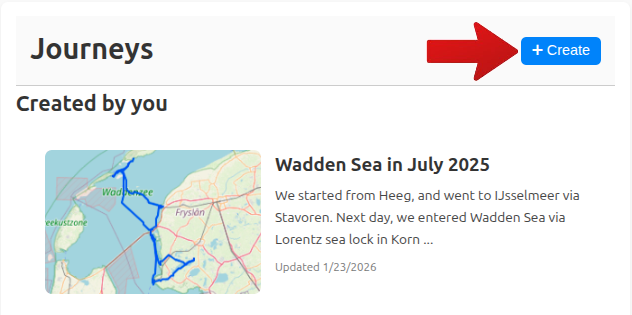
The user who creates a journey becomes its creator and controls its settings and access.
Automatic Location Labels
When you upload GPX tracks, the system automatically generates descriptive location labels (e.g., countries, regions, or mountain ranges) based on the journey's geography. These labels help you and others quickly identify where the journey took place.
As the journey creator, you can manually edit or refine these labels at any time from the journey page.
3. Editing Journey Details
The journey creator can edit:
- The journey name
- The journey description
- Location labels
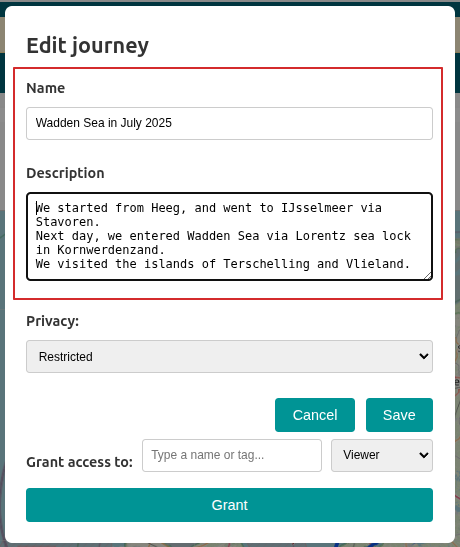
Changes are saved immediately and visible to everyone who has access to the journey.
4. Privacy & Access Control
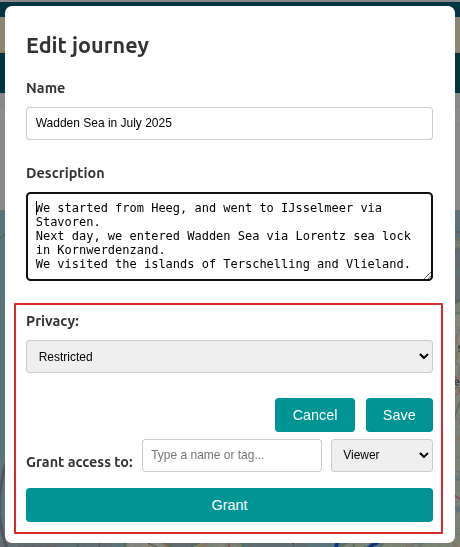
The creator of the journey manages the access rights to it. Only authorized users can add content to the journey. A journey can be either public or private.
Public Journeys
- Visible to anyone on wewent.to.
- Appear on the Explore page.
Non-Public Journeys
- Visible only to selected users.
- Not shown in public listings.
5. Roles & Permissions
- Creator – Full control over the journey, its content, and access.
- Contributor – Can add photos and GPX tracks.
- Viewer – Can view the journey but cannot add content.
6. Adding Photos and GPX tracks
- Open the journey.
- Click the Add button.
- Select one or more image and GPX files.
- Upload the files.
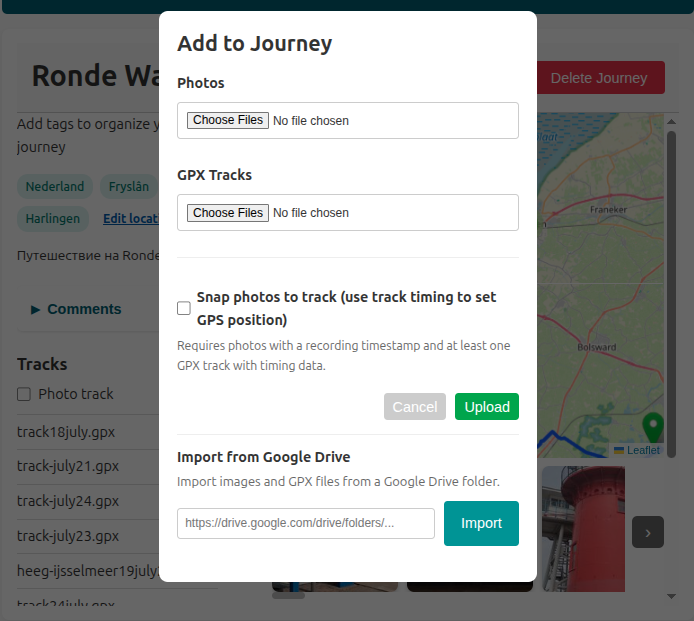
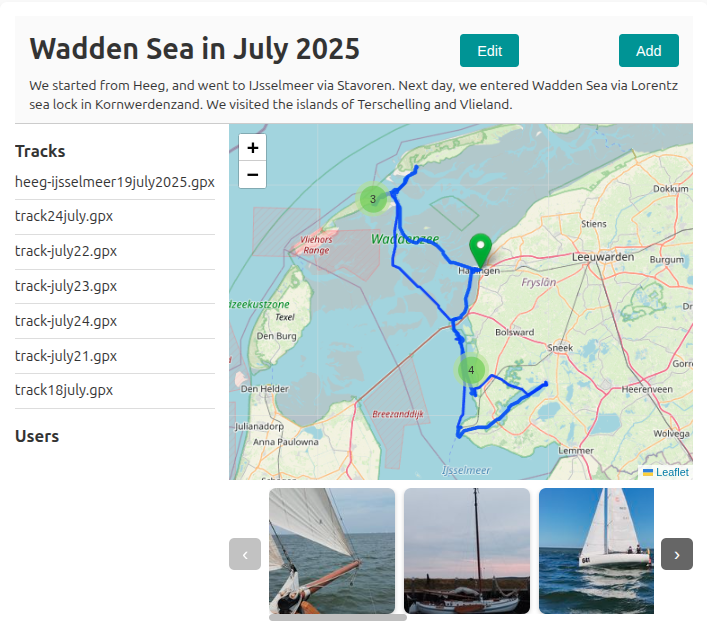
GPX tracks are displayed on the map; their names are listed next to the map.
Photos appear as thumbnails below the map and as markers on the map when GPS data is available.
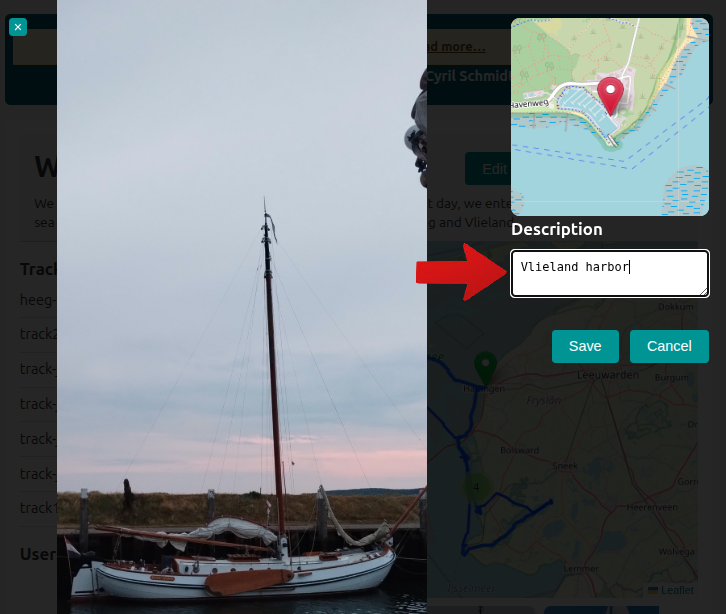
Clicking a thumbnail opens a full size image. You can navigate between photos using the keyboard arrow keys or the Next and Previous buttons on either side of the image overlay.
Editing Photo Descriptions
Users can edit the descriptions of photos they uploaded themselves.
7. Viewing a Journey
- Explore photos and tracks on an interactive map.
- Browse photos via thumbnails and full-size overlays.
- Follow the geographical story of the journey.
8. Commenting & Replies
You can engage with journey content through comments and replies. Comments can be added to journeys and individual photos.
Adding Comments
- Journey Comments: Scroll to the bottom of any journey page and use the comment form to share your thoughts about the journey.
- Photo Comments: Open a photo in full view and add comments directly on the image to discuss specific moments.
Threaded Replies
Comments support nested replies, allowing for threaded conversations:
- Click the Reply button under any comment to respond directly.
- Your reply will appear indented below the original comment.
- You cannot reply to a reply — keep conversations organized by replying to the top-level comment.
Editing and Deleting Comments
- Edit: Click the Edit button on your own comments to modify the text.
- Delete: Use the Delete button to remove your comments. Comments with replies will be soft-deleted (hidden but preserved for context).
Guest Interaction: If you are a guest viewing a public journey, you can log in or register directly through a modal window by clicking the Log in to comment button. This allows you to join the conversation without losing your place on the page.
9. Reactions
Reactions let you quickly show appreciation or engagement with journey content using emojis.
Available Reactions
Click the reaction buttons to add your response:
- 👍 Like – Show appreciation or agreement
- 😄 Haha – Indicate something is funny or amusing
- 😢 Sad – Express sympathy or sadness
- 😠 Angry – Show disagreement or frustration
Where You Can React
- Journeys: React at the top of any journey page.
- Photos: Open a photo and react using the buttons below the image.
- Comments: React to individual comments on photos and journeys.
Managing Your Reactions
- Clicking the same reaction again removes it.
- Clicking a different reaction type replaces your previous reaction.
Guest Interaction: Guests can log in or register via a modal when attempting to react to content, allowing them to participate seamlessly.
10. Forking Journeys
Forking creates your own editable copy of a public journey, useful for building on someone else's adventure or starting fresh with existing tracks.
How to Fork a Journey
- Browse public journeys on the Explore page.
- Open the journey you want to fork.
- Click the Fork button (usually near the journey title).
- A new journey is created with all GPX tracks copied to your account.
What Gets Forked
- All GPX tracks are cloned into your new journey.
- The journey name and description are copied.
- Your forked journey starts with private visibility (restricted access).
- Photos are not copied – you can add your own photos to the tracks.
11. Inviting Travelmates
Share private journeys with friends by inviting them to become viewers or contributors.
Sending an Invitation
- Open your journey.
- Click Invite in the button bar.
- Enter the invitee's email address.
- Select their role: Viewer (can view only) or Contributor (can add content).
- Add a personal message. This is not mandatory, but recommended. It greatly reduces the chances that your invitation will be mistaken for spam.
- Click Send Invitation.
Guest Access vs. Registered User
- Guest Access: The invitation link allows access without an account initially. Guests can view the journey but must create an account to add content.
- Registered Contributor: When an invited user registers with the same email, they become a full contributor with the role you assigned.
Managing Invitations
- Invitations are sent via email with a unique link.
- The invite link expires after seven days.
- Only the journey creator can send invitations.
- No more than 10 invitations per hour per user are allowed.
12. Importing from Google Drive
Import GPX tracks and photos directly from a Google Drive folder instead of manual uploads.
Connecting Google Drive
- Go to a journey you can edit (Creator or Contributor).
- Click Import from Google Drive in the journey edit view.
- You'll be redirected to Google to authorize wewent.to to read your Drive files.
- Grant permission for read-only access to your Google Drive.
Importing a Folder
- In Google Drive, create a folder containing your GPX and photo files.
- Copy the folder link (e.g.,
https://drive.google.com/drive/folders/ABC123xyz). - Paste the link into the import field.
- The system will scan for supported files (.jpg, .jpeg, .png, .gpx).
- Confirm the import – files will be downloaded and added to your journey.
Supported File Types
- Images: JPEG, PNG, JPG
- Tracks: GPX files
Important Notes
- Your Google account must have access to the shared folder.
- Maximum 100 files per import.
- Individual files over 50MB are skipped.
- The folder must be shared with your Google account, not just a public link.
13. Activity Feed & Notifications
The Feed page keeps you updated on the latest activity across the wewent.to community and your social circle.
Notifications You'll Receive
- New Followers: When another user starts following you.
- Content Added: When someone adds photos or tracks to a journey you have access to.
- Comment Replies: When someone responds to one of your comments.
- Social Activity: When users you follow create new public journeys or contribute to others.
- Access Changes: When you are granted or revoked access to a private journey.
Notifications are displayed in reverse chronological order, allowing you to quickly jump to the relevant journey or profile.
14. Following & Profiles
Connect with other travelers through the People directory and personal Profiles.
The People Directory
The People page lists all registered users. You can browse their avatars, usernames, and optional personal tags or descriptions.
User Profiles
Clicking on a user in the directory opens their public profile. Here you can see:
- Their identity details (username, tag, and bio).
- A list of all their journeys that you are permitted to view.
Following Users
You can Follow other users from their profile page. Following a user ensures their new public journeys and contributions appear in your Activity Feed. You can unfollow at any time.
15. Personal Tags
Organize journeys for your own discovery using Personal Tags.
How Personal Tags Work
- Private by Design: Tags you add to a journey are only visible to you. Other users, including the journey creator, cannot see your personal tags.
- Universal Access: You can add your own tags to any journey you have permission to view, even if you aren't a contributor.
- Easy Organization: Use tags to categorize journeys by theme (e.g., "hiking", "sailing", "2024-plans") for easy filtering on the Explore and Journeys pages.
Adding and Editing Tags
- Open any journey you can view.
- Locate the tag section beneath the journey title.
- Click to add or edit tags. Your changes are saved privately to your account.